
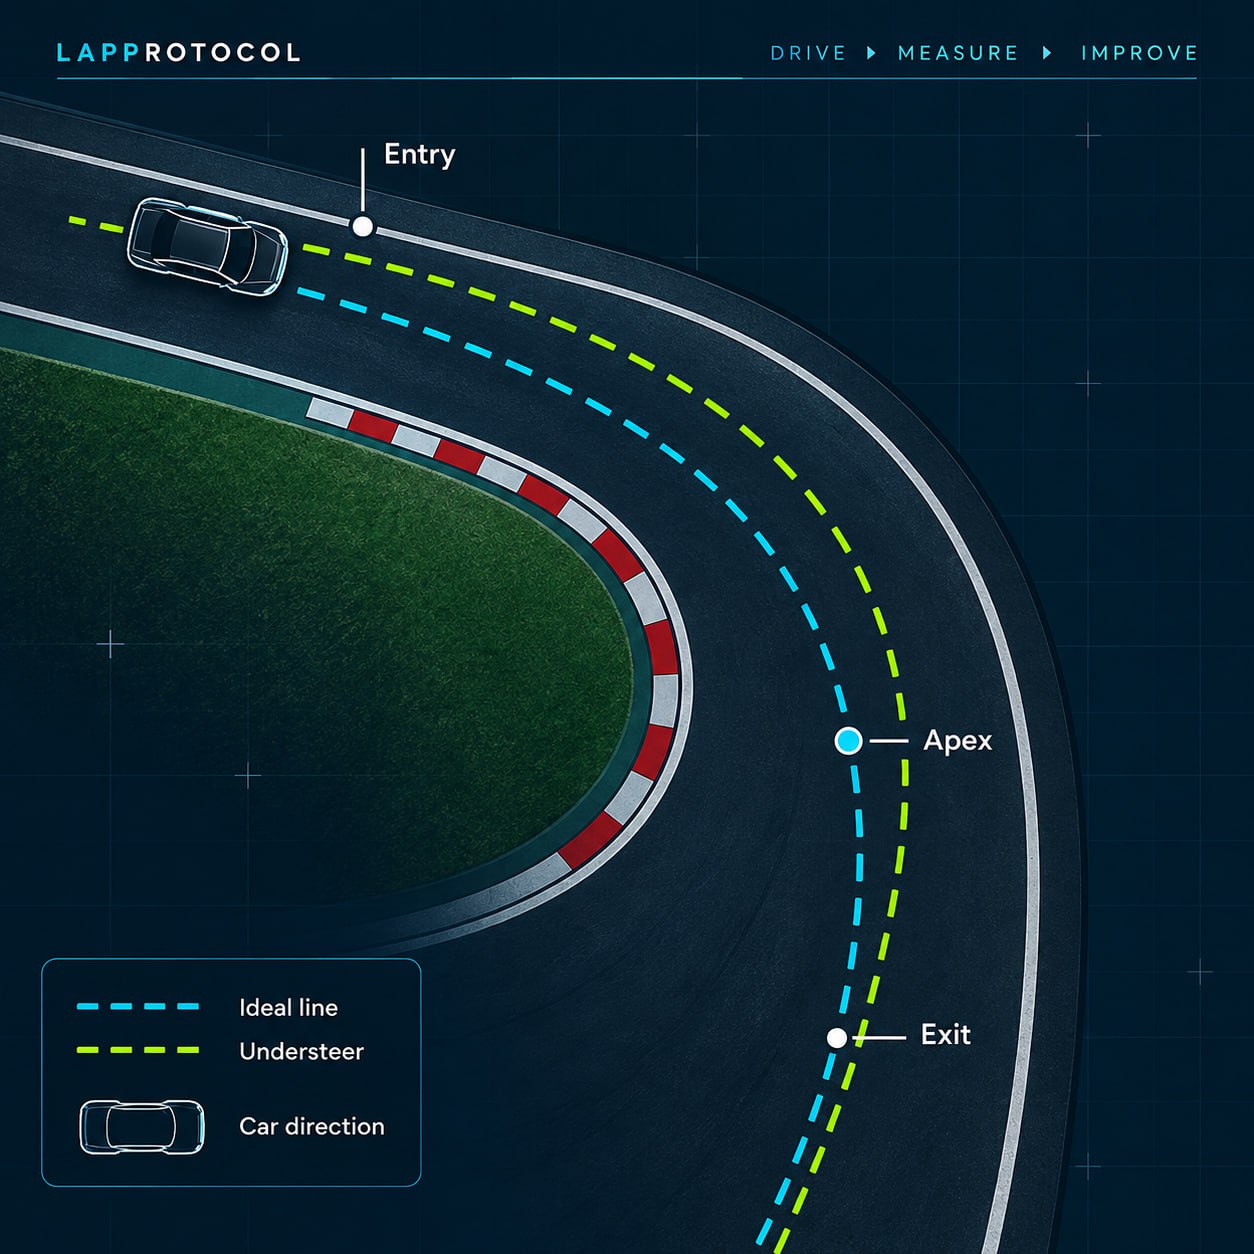
Understeer is a symptom, not a diagnosis. The front of the car may stop following the path the driver intended, but that observation does not tell you whether the main contributor was entry speed, braking, steering input, tyre state, track conditions, alignment, roll stiffness, damping or something else.
That is why “understeer” is a poor setup instruction. A car can feel similar at the steering wheel for different reasons, and its balance can change with tyre, surface, load or drivetrain use. The useful first question is not “what should I soften?” It is: what changed, when did the symptom appear, and what test could distinguish the explanations?
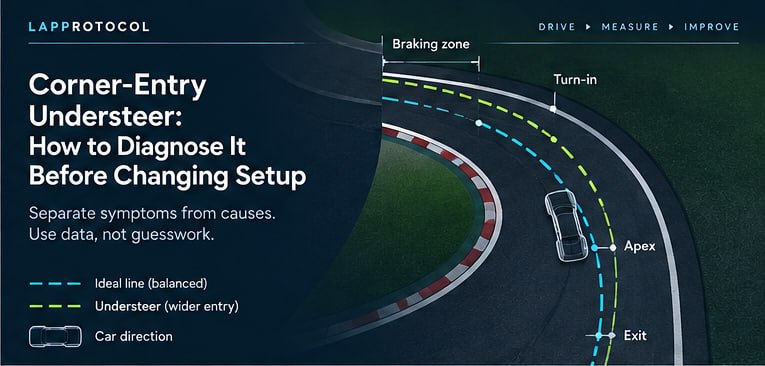
First identify when it happens
Operationally, understeer is the car turning less than the driver asks it to. The front tyres are the limiting end of the car at that moment, so the vehicle tends to run wider than the intended path unless the driver reduces the demand or the conditions change. This definition is supported in plain language by Driver61’s understeer guide and BFGoodrich’s cornering guidance.
The timing matters. Corner-entry understeer is the condition you observe from the initial turn-in through the early part of the corner, while the car is still transitioning from braking or straight-line approach toward the chosen path. Mid-corner understeer appears later, when the car is more settled in the turn. Exit understeer occurs as the driver approaches or passes the apex and begins to apply power. General lack of front grip may be present across several phases, but it is not the same diagnostic description as a symptom that is limited to entry.
Real corners overlap these phases. A late brake release can run into turn-in, and a delayed rotation can make the same problem look like mid-corner understeer. The point is not to create artificial boundaries. It is to identify the earliest point at which the front of the car stops following the intended path.
Do not confuse excessive entry speed with proof of a setup fault. It can exceed the grip of an otherwise sound car, while a setup or tyre condition can make the same input harder to manage. The driver and car form one system, so “driver problem” versus “car problem” is too simple to be useful.
Turn driver feedback into observations
“It understeers” is a valid starting report, but it is not yet a useful test description. Ask for the sequence around the symptom:
- Did initial turn-in feel responsive, followed by a loss of front grip?
- Did the car fail to rotate while brake pressure was being released?
- Did steering angle increase without a corresponding change in path or yaw?
- Did the symptom appear only in slow entries, only in faster corners, or in both?
- Did it appear after several laps rather than on the first lap?
- Was it worse in one direction or on one part of the circuit?
- Did it occur only while trail braking, only after the brake was released, or after throttle application?
These observations narrow the question without answering it. Trail-braking understeer points toward braking and combined tyre demand, but not necessarily a brake-bias or damper fault. A later-lap symptom makes tyre state worth checking; a left-right difference may involve circuit, load, surface or vehicle.
Write down the corner, direction, approximate phase, driver input and repeatability. If the report changes from lap to lap, record that too. Uncertainty is useful information when it prevents an overconfident change.
Separate entry speed, braking and steering effects
Start with the inputs that can be tested without changing the car. Repeat the corner in comparable conditions with a deliberately lower entry speed, while keeping the line and steering approach as consistent as practical. If the symptom is substantially reduced, excessive entry demand becomes a stronger hypothesis. It still does not prove that the car has no setup limitation, because a lower demand can hide one.
Next compare the brake release. Does the front stop following the line while meaningful brake input remains, or does it happen after the brake is released? Braking and cornering ask the tyres to produce forces in different directions at the same time. The available margin depends on the tyre and the demand, so “more braking” or “less braking” is not a universal cure. Driver61 specifically identifies braking while turning and excessive entry speed as possible causes, not as proof of one required setup change.
Steering rate matters as well. A rapid steering input can create a large immediate demand before the car has completed its transfer into the corner. If the driver adds more steering when the car does not rotate, the front tyres may be asked for still more cornering force while already sliding. That extra steering is evidence of the response, not evidence that a particular spring, bar or damper must be changed.
The controlled comparison is the important part. Compare a better and worse lap through the same corner, or compare two deliberate approaches on the same session when safe. Change one input at a time where practical and record what changed. Do not turn a single improvement at a lower speed into a claim that the car is fixed.
What telemetry can show
Telemetry can make the sequence more precise when its channels are available and time-aligned. Useful signals may include vehicle speed, steering angle, brake pressure or brake input, throttle position, lateral acceleration, yaw rate, wheel speeds and GPS path. Driver comments and tyre/session records remain valuable because telemetry does not capture every relevant condition.
Look at signals together and mark the corner phase. For example:
- Identify the approach speed and braking onset.
- Mark initial steering input and the start of turn-in.
- Note when brake pressure is released and throttle changes.
- Compare steering angle with vehicle path, yaw response and speed.
- Record where the car first departs from the intended line.
Increasing steering angle with little additional rotation may be consistent with front grip limitation, but is not a diagnosis alone. A lower minimum speed may mean the driver slowed enough to recover the line. Yaw-rate and wheel-speed differences may be real, but can also reflect line, speed, surface, input or other context.
Use telemetry to ask a sharper question: did the input change, did the response change, or did both change? Compare the same corner over more than one lap where possible. Do not invent thresholds for steering angle, yaw rate, lateral acceleration or speed when the vehicle, sensor and corner do not justify them.
Before comparing traces, use the Telemetry Data Quality Checklist to check whether the laps and channels are comparable enough for the question.
What the symptom and data cannot prove
A single report does not establish a setup fault or identify a universal pressure, alignment, anti-roll-bar or damper change. Even a repeatable symptom may have multiple contributors.
The Contact Patch discussion of oversteer and understeer is useful here because it distinguishes steady-state handling concepts from the transient behaviour that occupies much of real driving. It also describes how tyre slip, braking, acceleration, load transfer, drivetrain layout and suspension characteristics interact. That is a reason to keep the hypothesis conditional, not a reason to prescribe the same change for every car.
The car’s architecture matters. Front-wheel drive, rear-wheel drive and all-wheel drive can use tyre grip differently under braking and acceleration. A road car on a public track-day tyre is not equivalent to a race car on slicks. The same front or rear setup change can therefore produce different results across vehicles, and a source’s example should not be generalised beyond its stated context.
Check tyres and conditions before setup
Before changing geometry or suspension, check the simple context around the run. Confirm the tyre model, size, construction and condition. Review the cold and hot pressure record, if one exists, using the same measurement method and clear timing. Note the number of laps, ambient and track conditions, fuel or passenger load, traffic, surface changes and whether the symptom appeared as the tyres warmed.
The Cold-to-Hot Tyre Pressure article explains how to record those readings without turning an observed pressure rise into a target. The Cold-to-Hot Tyre Pressure Worksheet performs the subtraction for complete cold/hot pairs; it does not diagnose understeer or recommend the next pressure.
Inspect tyres, wheels, steering and suspension for damage, abnormal wear, loose components or other obvious issues. Pressure and telemetry cannot clear a physical problem. Follow vehicle, tyre, component and event guidance, and use competent inspection or installation for mechanical work.
Mechanical setup possibilities are hypotheses
If the symptom remains after the input and context checks, mechanical factors can become structured hypotheses. Alignment can affect the tyre’s relationship with the road through the corner. Roll stiffness distribution can influence how lateral load is shared between axles. Damping can influence transient response as the car takes a set. Tyre state and construction affect available grip.
These are categories for investigation, not a recipe. “Soften the front”, “stiffen the rear”, “change toe”, “alter pressure” or “add a damper click” is incomplete unless it states the hypothesis, the applicable vehicle context and the result that would support or weaken it. A source describing a tendency in one vehicle architecture does not establish the same direction for another.
For example, if the evidence points to a repeatable entry transient after a consistent brake release, a damping or brake-demand hypothesis might be worth discussing with a qualified technician. Penske Racing Shocks’ technical guidance describes damping as part of controlling suspension attitude, sudden inputs and tyre loading, but it does not establish a universal damper direction for this symptom. If the evidence points to a persistent corner imbalance after tyre and driver inputs are controlled, alignment or roll-stiffness inspection might be appropriate. Neither example says which direction to change. The next step depends on the actual car, parts, settings, guidance and evidence.
Build a discriminating test
A useful test changes the question, not just the hardware. Write it in four parts:
- Hypothesis: what might explain the symptom?
- Observation: what signal or driver report would support it?
- Controlled test: what one input or condition can be changed safely?
- Validation: what repeatable result would strengthen or weaken the explanation?
A practical sequence might be:
- Reproduce the symptom in a comparable corner and session condition.
- Repeat it with a deliberately lower entry speed.
- Compare earlier and later brake release while preserving the line where safe.
- Compare steering, brake, speed and path traces from better and worse laps.
- Check tyre condition and pressure records against the time and conditions.
- Only then choose one mechanical variable for inspection or controlled adjustment.
- Repeat the corner in comparable conditions and record what changed.
Do not run a test that creates an avoidable safety risk or violates event rules. If the car is unstable, damaged or behaving abnormally, stop treating the session as a setup experiment.
Change one thing and validate
When a mechanical change is justified, write down why it is being tested and what result would count as support. Prefer one meaningful variable at a time where practical. Keep the driver approach, tyre state, load and conditions as comparable as possible, while acknowledging that a circuit never provides a perfect laboratory.
A better result is not proof of the chosen cause. Driver adaptation, weather, traffic or a slower entry may have changed the result. Validation repeats the observation and checks for the predicted response under comparable conditions.
LapProtocol’s working sequence is symptom, measurement, interpretation, controlled change and validation. It is a way to keep decisions traceable, not a requirement to force the same headings into every report.
Practical diagnostic checklist
Before changing setup, record:
- the corner, direction and phase where the front stops following the intended path
- entry speed, steering rate, brake release and throttle context
- whether the symptom is entry, mid-corner, exit or more general
- driver description and repeatability across laps
- available speed, steering, brake, throttle, lateral acceleration, yaw, wheel-speed and GPS signals
- tyre identity, condition, pressure record and session timing
- ambient, track, fuel/load, traffic and surface context
- the hypothesis and the discriminating test
- the single controlled change, if one is justified
- the validation result and what remains unknown
The result may be “not confirmed yet”. That is better than converting a vague symptom into a confident but unsupported setup instruction.
Sources and methodology
This article uses The Contact Patch for vehicle-dynamics definitions, load-transfer and drivetrain context, Driver61 for accessible symptom and driver-input examples, BFGoodrich for plain-language understeer and entry-speed context, and Penske Racing Shocks for general damping and transient-load context. Their examples are kept conditional and are not converted into universal setup prescriptions.
The diagnostic method is LapProtocol editorial methodology: symptom, observation, measurement, possible causes, discriminating test, controlled change and validation. It does not replace manufacturer guidance, component inspection, event requirements or qualified technical advice.